

How To Clean Glazing Putty From Glass
How to Remove and Supercede old Glazing Putty and Glass From Unmarried Pane Windows and Sash Windows Using a Hacking Pocketknife
This projects describes how yous should use a hacking knife to chop out old and damaged glazing putty and so you can remove a pane of glass from a unmarried pane window or sash window. Learn how to then clean everything up, supervene upon the glass and so apply new glazing putty to reseal the window. You volition besides detect out how to remove and replace window pins and nails hands without damaging any glass.
Removing old putty from single pane window frame to remove the glass is ane of the all fourth dimension most hated jobs past tradesmen and DIY'ers alike.
Essentially, removing single pane glazing is every bit simple as prying away whatever old putty (or glazing compound) from the window frame and softening any stubborn areas with a heat gun or linseed oil every bit required.
Once the putty is gone, remove any glass retaining nails and then the glass should pop direct out.
This may sound like a very simply straight forward job, but if you have never washed it before at that place is a adequately wide telescopic for things to go wrong, and then read on beneath for tips on how to remove erstwhile putty with the minimum of fuss.
Why was Glazing Putty Used?
Dorsum in the days earlier upvc and double glazing, windows were traditionally formed past using either steel (usually galvanized) or timber to build the frame and a single pane of glass was dropped into information technology.
Small nails or spriggs as they are also known were then hammered downwards into the frame to agree the glass in place.
Contrary to what some people think, it's the nails that hold the glass in the frame and not the glazing putty. The glazing putty is simply there to seal the glass to the frame and preclude any draughts or h2o ingress into the frame.
This common misconception does lead some DIY'ers to try and replace panes of drinking glass into frames just using the putty to concur it with not much success and generally a smashed pane of glass on the floor.
Fortunately, if the window putty was applied correctly in the commencement place, it can last for many many years before it needs to be replaced, so thankfully, this shouldn't be a chore that needs to be done too often.
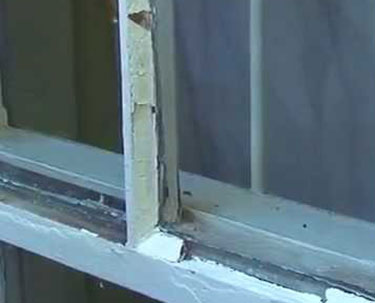
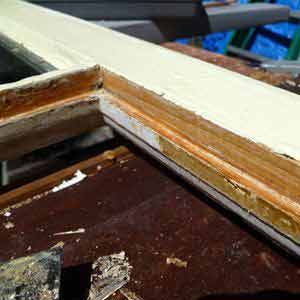
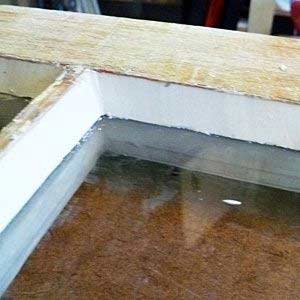
A single pane glazed window using traditional putty to seal it that's now old and damaged
A Quick Note on Asbestos and Lead Paint
If your windows are particularly quondam and accept never, or at least not in the last 30 years, had the putty replaced then there is a adventure that the putty itself may contain asbestos.
If there is even the slimmest of chances that this may be the case then yous should definitely not effort to impact or disturb the putty in whatever way! It volition demand to be removed past specialists in a controlled manner.
For more information on the dangers of asbestos and also on a DIY testing kit that can exist used to examination whatever doubtable putty for traces, see our project on asbestos here.
Besides the dangers posed by asbestos, you also need to exist aware of the dangers posed by atomic number 82 paint.
Again, if the windows you're working on haven't been touched or restored since the late lxxx's or early 90's, there's a chance that the existing paint could comprise lead.
To find out more about atomic number 82 paint and how to strip it safely, see our project on stripping lead paint here.
How to Remove and Supersede Glazing Putty and Unmarried Pane Glazing
Equally we have established, this is a bit of a tricky, frail and time consuming job that substantially involves prying or hammering adjacent to a thin pane of glass – a recipe for disaster!
Bated from this, if you work carefully and take your fourth dimension then it's more than than possible to remove the old glazing putty and piece of glass and replace the whole lot and even so get a expert finish.
As with any DIY job and this is no exception, always vesture suitable protective gear and wear. Decent hand whatever center protection is an absolute must. 1 stray hammer blow tin easily shatter the drinking glass, sending shards all over the place, so make sure y'all're protected!
Pace 1 – Remove the Window if Possible
To make the job a little easier, if you can, remove the whole window and frame so that yous can work on it on a apartment level surface. This volition make things a little easier.
If yous're working on a side or acme opening section you should exist easily united nations commodities information technology from the carriers and remove it.
With the window removed discover a dainty solid and level bench to identify information technology on. A purpose congenital workbench is all-time but a Workmate or similar will likewise be perfectly fine.
Ensure that no areas of the glass itself are resting on annihilation. If they are, the second whatever pressure is applied the glass will break.
One time in identify on a apartment surface, clamp the window down and so that information technology can't move while you're working on it. When clamping up, try to clench using the centre of the window frame and again, ensure that none of the glass is under any pressure.
Tip: Place a thick sheet or coating betwixt your window and your work surface before clamping it down. This will help to blot whatsoever vibrations acquired when hammering that could potentially crack the glass.
If you unable to remove the window you lot volition accept to piece of work on it where it is. This makes things a little more difficult, but certainly non impossible.
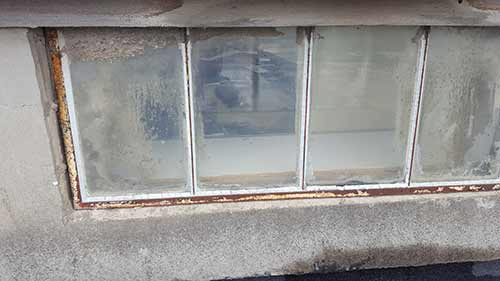
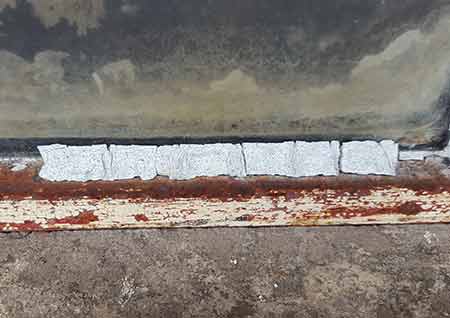
Erstwhile galvanized steel window needing urgent putty replacement – The window could non be removed so had to be repaired where information technology was
Pace 2 – Chisel out Putty
With your window firmly clamped it's time to outset chopping out the old putty.
If you are removing the putty in order to replace the glass considering information technology's damaged or you have inadvertently smashed it, then nosotros don't demand to worry about keeping it prophylactic and we can as well save a chip of fourth dimension by smashing the remains now. This will make getting the putty off much easier.
Earlier putting a hammer straight through it, put on some decent eye protectors and thick cutting resistant glove and so identify an old thick sheet or towel over the glass covering it fully and gently tap information technology with a hammer to suspension it up.
Once all cleaved up, pull any remaining shards out (with your gloves on) and collect up equally much of the glass equally possible and dispose of it.
If you are definitely wanting to relieve your pane of glass, firstly using a razor bract or abrupt knife, run information technology around the very edge of the putty where it meets the glass to pause the seal.
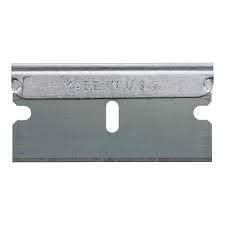
A razor blade or abrupt knife can exist used to break the seal and loosen the putty from the drinking glass
Repeat this for several passes, applying a little pressure each time to edge further into the putty.
With this seal broken, information technology'due south time to start chopping the putty out!
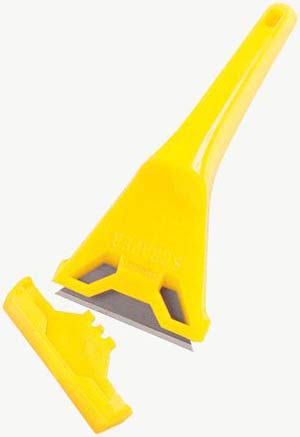
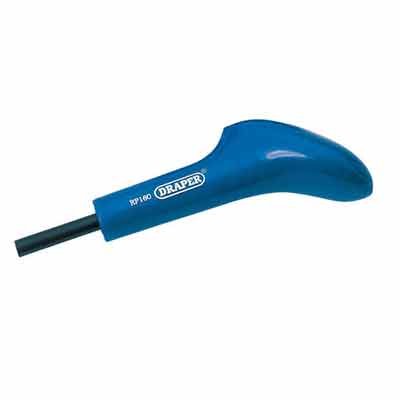
The all-time tool to use for chopping out old putty is a hacking knife (seen in the epitome below) as it'south made specifically for chopping out putty, filler, old cement and similar materials.
Hacking knife used for removing putty from single pane traditional window
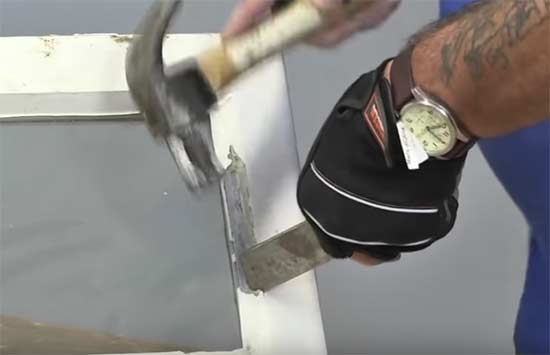
Using a hacking knife to remove putty from an one-time window frame
Starting in the middle of 1 side of the window, take your hacking pocketknife and hold the blade edge against the putty at roughly 45° (as in the prototype below), with the blade roughly in the heart of the putty environs.
Using a hammer, gently tap on the apartment edge of the knife until yous see it cutting into the putty. The hacking knife is deliberately not razor sharp to preclude damage to the frame which always happens if you use a wood chisel.
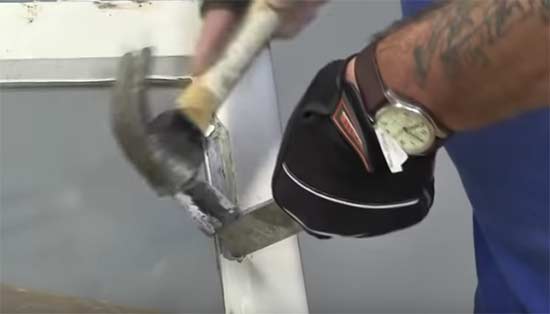
Tap the tiptop of the hacking knife gently down to chop out the old putty from the window frame
Keep tapping the hacking knife down towards the frame and the chunks will ping off. You will soon get used to how hard you lot tin striking information technology.
Which ever way your frame is lying, always striking down towards the frame. Never hit downwards towards the glass or you lot volition nail information technology.
One time yous have removed a chunk of putty you should be able to come across how deep it is and where the frame is then that you lot know exactly how deep y'all tin hit the pocketknife down without accidentally chopping into the frame.
Continue chopping away the erstwhile putty along the surroundings, ensuring that you get correct down into each corner.
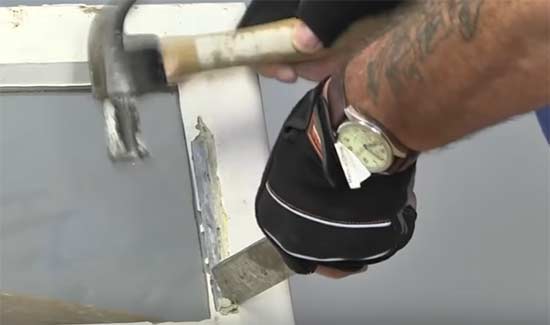
Make sure that you get the hacking knife correct down into each corner to remove all the window putty
Movement yourself around the window as you lot chop, don't be tempted to contort yourself into some awkward position as this is how accidents happen and harm is caused.
Carefully work your way around the perimeter of the drinking glass, chopping out whatever and all putty with the hacking knife as y'all go until all putty has been removed.
To soften any hard putty you can use a heat gun. Heating the putty up will cause it to go soft and make removing it much easier.
Run the heat gun over the putty from side to side, being conscientious not to concentrate any oestrus in one spot for too long as if glass gets too hot it will fissure. Y'all can use some thick pieces of timber cutting to length to shield the drinking glass from the direct estrus from the gun.
Once soft you should then be able to chop it out.
Stride iii – Clean the Frame of any Remaining Putty
With all the major chunks of putty removed, the adjacent task is to go around the frame and remove whatsoever small lumps or bumps that remain.
This is an essential step if you lot are hoping to remove any glass in i piece without damage as even the smallest of lumps is enough to foreclose the glass from moving freely. If it can't move freely and easily then there'southward a good chance it'due south going to go damaged.
Pay particular attention to any corners as this is where glass is at its weakest.
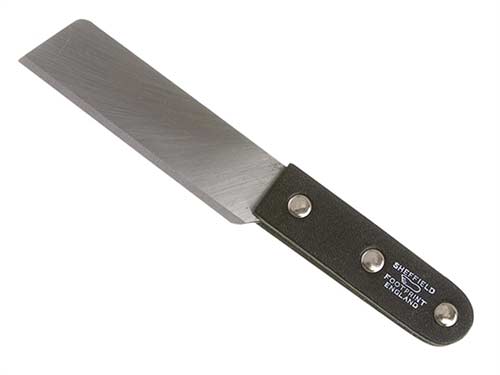
The all-time tools to utilise for fine cleaning whatsoever remaining putty from your window frame is still a hacking pocketknife only to really become deep into those corners y'all may also find a putty knife or window scraper useful equally they are a little sharper.
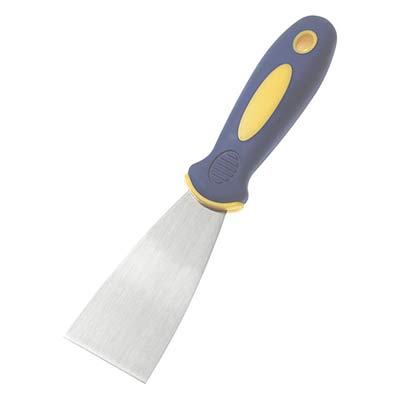
Yous can use a putty knife to remove any remaining putty from the window frame
You tin too use a window scraper to fine clean any remaining putty from the window frame
Step 4 – Remove Nails or Window Pins and Glass
With all the putty now gone you should be able to clearly see any nails (spriggs) or window pins. These are the final obstacle to overcome in order to finally remove the glass.
Nails or window pins can exist a lilliputian catchy to remove due to the fact they are then close to the glass.
The best method of removing nails or window pins is to either pry them up with a small screwdriver if you are able to get whatsoever buy or use a pair of needle nose pliers to grip the caput and pull them out.
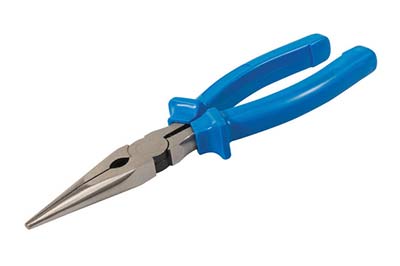
Needle nose pliers are i of the best tools to utilise to remove window nails or window pins
Equally they are not hammered in besides far, due to the need to really hold the glass, as long as you can get a practiced grip on them they should come out fairly easily.
Work your fashion around the window removing whatsoever and all nails or pins as yous go.
Once they have all been removed, do a concluding check for anything that could restrict the glass from coming out and and then give the glass a very gently push with the flat of your paw on one of the edges.
If information technology moves freely that's great news! Carry on and remove the pane and put it to i side out of the way.
If not then its probably been bonded in using silicone or a like sealant. In this situation, use a razor blade to run around the border of the glass on both sides then see if you can motion it.
If it still doesn't budge, effort a silicone sealant remover/dissolver to see if this will affect it enough to enable y'all to push the drinking glass out.
After trying all of these and it still won't shift, you lot may observe your simply pick is to smash the glass and remove it that manner.
Step 5 – Prime the Window Frame
Once the glass has been removed, use a window scraper and piece of sandpaper to thoroughly clean the inside of the window reveal or "rabbet groove" every bit it'southward too known and then that it is free from any form of sealant, putty or old paint.
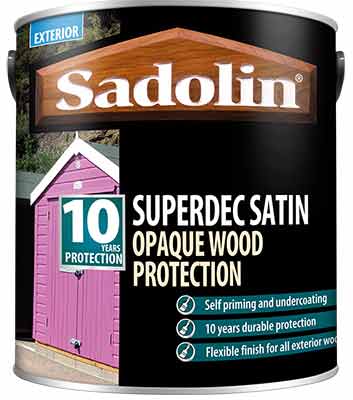
One time thoroughly cleaned prime information technology with a decent exterior wood primer or paint system such as the Dulux Weathershield system or Sadolin or similar. A microporous paint system is also a great solution as this will allow the timber jiff as well as allow the paint to flex along with expansion and contraction so that it doesn't crack.
Microporous paint ideal for treating rabbet grooves on windows earlier refitting single glazed panes of glass
Step six – Clean the Glass and Refit to Window Frame
With the inside of your frame or rabbet groove now primed and undercoated as required it'south time to get the drinking glass back in.
Run a very thin bead of silicone effectually the rabbet groove every bit this will help to seal the glass and prevent any draughts or water ingress. Although the new putty that you lot're going to use volition have intendance of this job, it won't hurt and will provide an additional layer of protection.
However, if y'all are planning on removing the glass again in the near future you may want to skip this equally it will brand the glass harder to go dorsum out.
Advisedly remainder the drinking glass back into the recess or rabbet groove and ensure an even gap all around the perimeter.
In one case cleaned the glass can the exist refitted back into the rabbet groove of the window
With the glass in place you can now fix nails/console pins or window pins around to hold the glass in the frame.
This can exist fairly difficult as knocking anything it with a hammer this close to a sparse piece of glass is request for trouble, simply if you take a steady hand information technology is possible to apply a small tacking hammer to knock in the nails or window pins.
If you're not confident in doing this yous can apply a "brad pusher or console pin setting tool" to push in whatever nails or brads and yous tin too use the edge of a putty knife or scraper to "button" window pins in.
As window pins and the very small nails (or brads or finishing nails) yous volition be using here are very sparse they can easily be pushed into a timber window frame.
But be careful when applying an pressure to any area around the drinking glass. Make certain the pressure level is not existence applied to the glass itself or in whatsoever style that the tool y'all're using tin can slip!
Brad pusher or panel pivot setting tool
Stride 7 – Utilise new Putty
Once any nails or pins take been stock-still in place to hold the glass in the frame, information technology's at present time to utilise some putty.
In terms of the putty itself, there are quite a few types available, only generally the best glazing or window putty is a Linseed oil based putty as their easy to piece of work with and last a decent amount of time.
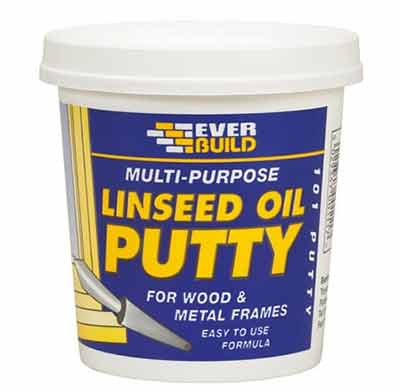
Linsee oil based glazing putty – Bachelor form our online shop here
Occasionally, in club to brand Linseed-based putties workable you volition demand to warm information technology upwardly. To do this, eddy a kettle and cascade the boiling water into a pan and then place the sealed tub of putty into the water. This will warm the putty inside and make information technology much more than malleable and workable.
Once it's squeamish and workable mix the putty thoroughly to brand certain all the oil is mixed throughout the putty evenly as it tends to separate when left in the tub for a while.
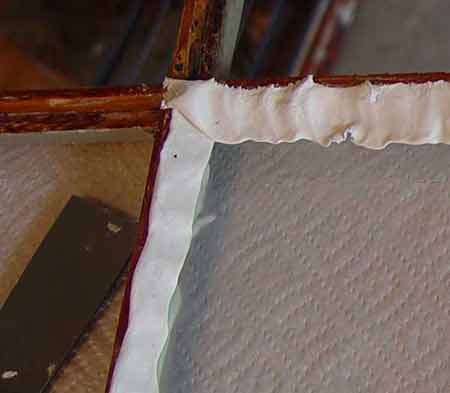
To utilize the putty around the window frame, roll a section of it out into a "sausage" so that it's virtually 10-12mm in bore and so place it along one edge or use a putty knife to scoop it from the pot and apply it to the groove.
Repeat this until you have covered the entire internal edge.
Glazing putty applied around rabbet joint of window ready to exist pushed into the joint and smoothed – Image courtesy of oldhousefix.com
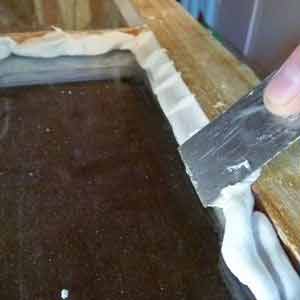
To get it nice and smooth, apply a putty knife of filling pocketknife. First put some white spirit on the edge of the knife to lubricate it, this will assist you to get a adept finish.
Hold the front edge of you knife flat down on the drinking glass at 45° and pull information technology back into the putty, gently forcing the putty into the joint. Make sure you lot only apply gentle force per unit area into the joint and not on the drinking glass.
Work your way around the window working the putty into the joint as you go. Don't worry also much about getting it smooth at this stage, we're just concentrating on ensuring the articulation is completely full with no air gaps or dips and that the putty sits at a nice 45° angle as this is the correct angle for glazing putty.
Make sure you dip your putty pocketknife regularly in white spirit to keep it lubricated.
Once you lot accept completed one pass of the full window, offset once more from the outset, this time smoothing over any lines and rough patches. Echo this for as many times as you need until your putty is perfectly smooth.
Glazing putty pushed into rabbet joint and smoothed out – Paradigm courtesy of popularmechanics.com
In terms of getting your putty smooth in the corners and getting a nice crisp line, this can be a little tricky. Ideally, each corner should be mitered at a perfect 45° bending at each xc° corner. Use your putty knife to form each mitre so smooth it out.
In one case all of your lines and mitred corners are smooth, utilize your putty knife to tidy upward the joint where the putty finishes on the glass. This should as well be every bit perfect a straight line equally you tin can get it.
Glazing putty formed into a mitre joint in corner of window – Paradigm courtesy of popularmechanics.com
If you demand to remove any excess putty, employ your putty pocketknife to pull it away from the edge towards the center of the pane of glass. Yous tin can then wipe information technology away.
With your putty now all smoothed and corners formed at nice crisp 45° mitred angles you're pretty much washed. The only thing left to do at present is to wait for your putty to dry and then get some paint on information technology.
Depending on the type of putty y'all have used, this can be anything from a few hours to a few weeks. If you opted to employ a Linseed oil based putty then yous should be looking at about 2 weeks before it is dry enough to paint.
Check your manufacturers recommended drying times which should exist stated on the tin can or packaging your putty came in. One other mode to check is later on a week or so, very gently rest your finger on the putty. If it'south difficult then it's ready and set for painting.
Step 8 – Painting Glazing Putty
One time your putty is difficult ans prepare you will and so need to pigment it. This is essential as putty will last much much longer once it's painted, normally anything up to ten years. If unpainted, putty will merely last up to effectually 1 twelvemonth.
When painting your putty, also make sure that you paint over the joint where the putty meets the glass to seal it and prevent whatever water or moisture getting in. You should overrun y'all paint onto the glass roughly 3-5mm to become a skillful seal.
You may exist tempted to skip this step due to the fact that that it will make the task look untidy but please don't, it is a necessary step! If yous go along your painted line as straight and crisp equally possible it volition still look simply every bit good.
Once painted and stale you're at present done. Your unmarried pane glazed window should now be good for at least 8 years or and so.
Chopping out and removing old putty from a single pane glazed window certainly isn't the nicest of jobs to do, but if you take your time and work carefully and methodically it's certainly i that you tin can get a nifty, tidy professional person looking finish with.
Can you put new Putty Over erstwhile Putty?
In answer to this, yes you lot certainly can apply new putty over existing old putty, but you will demand to make sure that any quondam putty that you lot get out is in good condition.
If you take a window where some of the putty has started to crack and fall out it is possible to remove any loose bits and just replace these equally opposed to removing the whole lot.
However, when nosotros say good status we mean there are no splits or cracks in it and too that it is stuck overnice and firmly to the rabbet groove and too the glass.
Information technology is also possible to repair croaky putty. Mix boiled linseed oil with some glazing putty to create a thin paste then force the paste into any cracks in existing putty using a small brush.
Erstwhile and cracked glazing putty that needs repairing or replacing
Once dried, this will plug any splits and gaps, only as with replacing putty, to ensure information technology lasts information technology will need to be painted.
Bated form this, to ensure the best possible protection and stop for your putty it is e'er all-time to do the job properly, remove all the putty and replace it with new.
Are There Alternatives to using Glazing Putty?
In reply to this question, yeah there are alternatives to using glazing putty, the obvious one beingness just to replace the window with a new double glazed unit.
In some situations and locations it isn't always possible to exercise this. If y'all take single pane sash windows and live in a conservation area then it may be stipulated past your local authority that y'all have to take this type of window.
If this is the instance or you like the look of a traditional single pane glazed window then the other culling to using glazing putty is to use a timber bead, timber moulding or timber quadrant (different names for the same thing).
Timber chaplet, mouldings or quadrants come up is a range of different shapes, styles and designs but the most common is the half circular (seen in the image beneath).
As you tin see the moulding is shaped very much like the putty when information technology's practical to the window and gives the same well-baked and clean terminate.
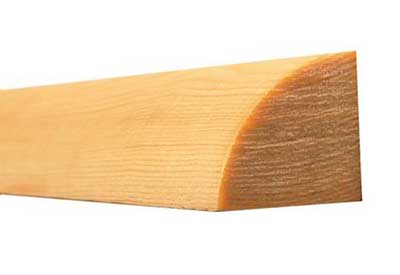
Timber beads or quadrant can be used in place of glazing putty
As with the putty, all corners are mitre cut to not but look cracking but to also provide a good seal.
Earlier any mouldings are fixed in place on a window a sparse bead of silicone is run around the rabbet groove to create a seal and so the dewdrop is fixed in identify using small nails or brads.
As with the putty, to get the best and most long lasting finish, the bead or quadrant will need painting.

Source: https://www.diydoctor.org.uk/projects/chopoutglass.htm
Posted by: westendorfwhosto.blogspot.com
0 Response to "How To Clean Glazing Putty From Glass"
Post a Comment